Learning Objectives
Following this assignment students should be able to:
- Load data from various locations
- Create a reproducicble development environment
- Construct relative paths
- Apply house style
- Employ Stata’s order of operations
- Revise and reformat code
Reading
Topics
- Project directory
- Relative paths
- Format
- Style
- Readable code
Readings
- Reading (just section 1.2): Starting to coding
- Reading: Suggestions on Stata programming style
- Reading: In Stata coding, Style is the Essential: A brief commentary on do-file style
- Video (2 min): Absolute and relative paths in general
- Video (2 min): Setting relative paths in Stata
Lecture Notes
Exercises
-
Load or Download File (10 pts)
There are a number of different ways to get data into Stata. And Stata can handle a number of different file formats. The way to load data into Stata requires answering several different questions.
- Is the data remote (in the cloud) or local (on your machine)?
- If the data is local, what is its location relative to your working directory?
- What is the file format of the data?
Knowing the answer to these questions will tell you which of the many ways you will want to load data into Stata.
-
You can load data into Stata directly from a website. If the data is in Stata’s
.dtaformat, you can use the standard Stata commands for loading data, just give it the absolute pathway to the location of the data on the internet. Install data fromhttps://haghish.github.io/github/langlist.dtaand thendescribethe data. -
You can also download data to your machine, placing it in a specific folder, and then use the absolute path to load the data useing
use. Download the filetenuredata.dta. Take care to note where you save this file. Then load the data into stata anddescribethe data. -
Stata has a number of different example data sets that get download to your machine when you install Stata. Stata knows where these files are so one does not need to provide an aboslute or relative path when loading them. Load
cancer.dtausing thesysusecommand. Thendescribethe data. -
Stata can also input almost any type of data file and convert it to a
.dtaformat. To do this, you use a compound command that starts withimportand is followed by the format of the file. Type inhelp importto get a list of all the different types of files Stata can import. Download the filedistrict_size.csv. Again, take care to note where you saved the file. Then usehelpto find the Stata command to import a comma-separated (thecsin.csv) file. Describe the data.
-
Format the Code (10 pts)
Programming computers to do cool science is a major advantage for modern scientists. But, developing research programs that are transparent, collaborative and reproducible is a major advantage for science. All data scientists can contribute to this goal by writing their code in easily readable, well described, and well commented scripts.
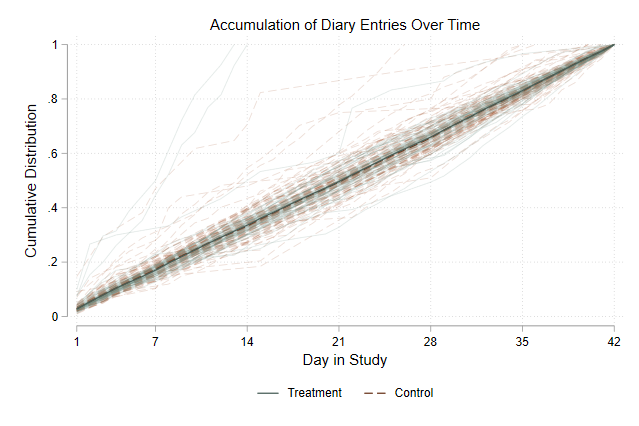
This script, which evaluates the number of diary entries made over time by treatment and control households in a solar stove field experiment that I ran, doesn’t follow good style. It works, but it’s difficult to understand exactly what it is doing.
- Download the script
- Download the data
- Take a minute to try understand what is going on (you won’t perfectly because you are unfamiliar with many of the commands)
- Modify the code so that it still does the same thing, but is easier to read because it has better style
-
Basic If Statements (15 pts)
Load
auto.dtausing thesysusecommand.1. Create a variable
ythat equals “1” ifpriceis less than or equal to “4195”. How many cars have a price less than “4195”?2. Replace the value of
ywith a “3” ifpriceis greater than or equal to “6342”. How many cars have a price greater than “6342”?3. Replace the value of
ywith a “2” ifpriceis greater than “4195” and less than “6342”. How many cars have a price between “4195” and “6342”?4. The code below creates a
globalcalledpackthat equals “1”. Complete the code so that if$pack == 1the code prints “Setup mode: running installation/setup steps…” and if$packdoesn’t equal “1” then the code prints “Run mode: skipping setup and continuing with the analysis.” Set$packto something other than “1” and run the code again.global pack 1 if XXX == y { } else { }5. Update your code above by adding an
else ifstatement that prints “Update mode: updating ado files…” if$pack == 2
-
Code Shuffle (15 pts)
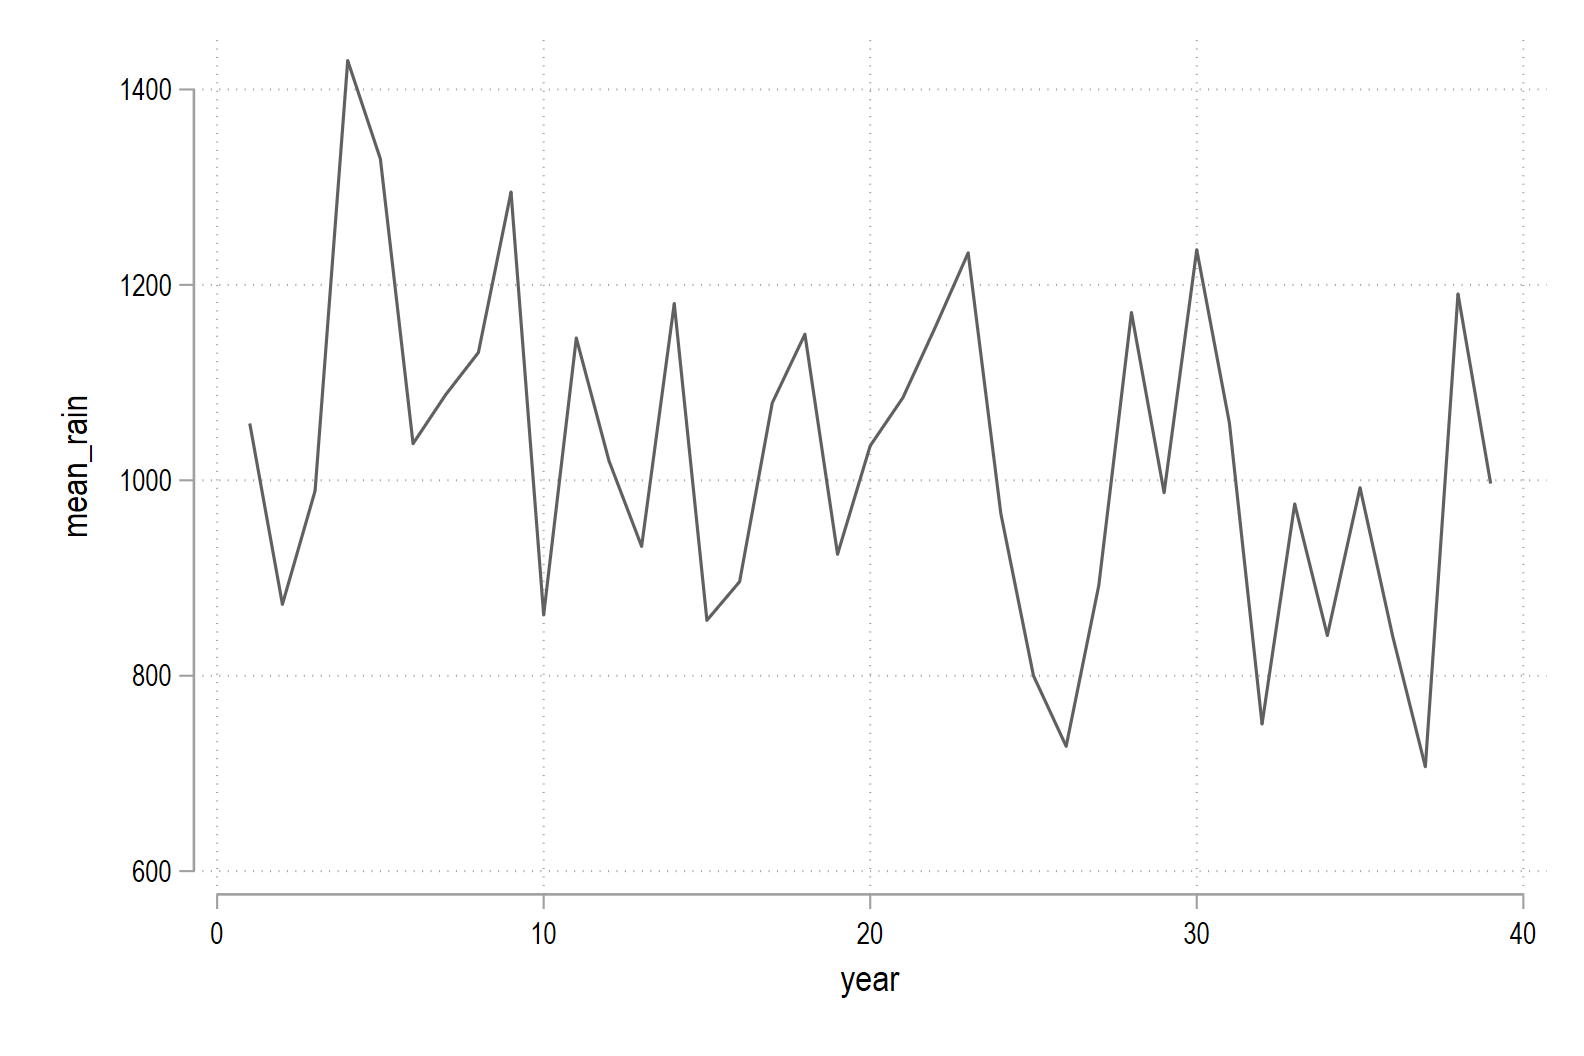
We are interested in understanding the monthly variation in precipitation near Gainesville, FL, so that we can understand the correlation between rainfall and citrus yield. We’ll use some data from the NOAA National Climatic Data Center. Each row of the data is a year (from 1961-2013) and each column is a month (January - December).
Rearrange the following program so that it:
- Imports the data from the web into a data frame
- Creates a variable called
yearwhich tracks how many years it has been since 1960 - Calculates the mean precipitation in each month across years
- Plots the monthly averages as a simple line plot
Finally, add comments above each code bloack that describes what it does.
It’s OK if you don’t know exactly how the details of the program work at this point, you just need to figure out the right order of the lines based on when variables are defined and when they are used.
    egen		mean_rain = rowmean(v*)
	twoway		(line mean_rain year)
	gen			year = _n
    import		delimited "https://datacarpentry.org/semester-biology/data/gainesville-precip.csv", clear
-
Create Project Do (40 pts)
For this exercise we are going to create a
project.dofile that we will use on this and all subsequent assignments.1. Open your Stata Project and in the blank
.dofile editor start by typing in our standard preamble (using either 497 or 597 for course).* course: AAE 597A * created on: dec 25 * created by: jdm * edited on: 16 dec 25 * edited by: jdm * Stata v.19.52. Then type in a a bulletted list of what this file does and what it assumes that a user has on their computer. This part of the preamble isn’t required for assignments, since what an assignment
.dofile does and assumes is pretty self explanatory. But when you start doing research, having a list of what a file does, assumes, and if the file is complete (TO DO) is very useful. It allows you (or your advisor) to quickly see what a file contains without reading through the code.* does * establishes identical development environment for users * sets globals that define absolute paths * loads any user written packages needed for analysis * runs all assignment do-files * assumes * access to all data and code * TO DO: * done3. Next, create the
0 - setupsection that comes after the preamble in every file that you write. Typically this is where we set our relative paths. But for theproject.dofile we are going to start by creating aglobalcalledpack(short for package) and we will set the value ofpackto0. We will call thisgloballater in theproject.dofile. After we createpackwe want to specify which version of Stata the code runs on.****************************************************************** **# 0 - setup ****************************************************************** * set $pack to 0 to skip package installation global pack 0 * Specify Stata version in use global stataVersion 19.5 version $stataVersion4. Now we will use a combination of
localandglobalmacros, along with a conditionalifstatement, to dynamically set the working directory. * Theifstatement will define the globalcodeanddataas absolute paths, depending on which computer the code runs on * Thec(username)local checks to see what the computer’s username is (c(username)) * The globalcodeis assigned a value that equals the absolute path on the machinejdmichlerto the git repo where the code lives * The globaldatais assigned a value that equals the absolute path on the machinejdmichlerto the cloud-based storage system where the data lives * Since git syncs repos with the cloud, it is redundant to store code on a cloud-based storage system * This is not true for data, so make sure you save data to Dropbox, OneDrive, Google Drive, Box, or some other storage system that syncs or backs up to the cloud * In addition to defining the globalscodeanddatafor your own machine, make sure you also define them for my office desktop (jdmichler) and my laptop (jdmic) as written below. * This will allow me to run your code on my machine without changing any of your code.****************************************************************** **## 0.1 - Create user specific paths ****************************************************************** * Define root folder globals if `"`c(username)'"' == "jdmichler" { global code "C:/Users/jdmichler/git/semester26" global data "C:/Users/jdmichler/dropbox/semester26/data" } if `"`c(username)'"' == "jdmic" { global code "C:/Users/jdmic/git/semester26" global data "C:/Users/jdmic/dropbox/semester26/data" }5. Add an additional section (call it
**# 1 - run assignment files) to theproject.dofile that runs or executes assignment 2 so that when I check your work I only have to run theproject.dofile and it sets the development environment and runs all the code you wrote for assignment 2. This is what is known as “push button replicability.” To do this, you need to use thedocommand and write out the relative path for the location of assignment 2. The path will be “relative” to the absolute path defined incodeso it should start with the global$code.
-
Check That Your Code Runs (10 pts)
Sometimes you think you’re code runs, but it only actually works because of something else you did previously. To make sure it actually runs you should save your work and then run it in a clean environment.
Follow these steps in to make sure your code really runs:
-
Restart Stata by closing the instance of Stata that you have open.
-
When you reopen Stata, type in the command line
clear all. Or, better yet, putclear allat the top of your.dofile, after the preamble but before any commands. -
Rerun your entire homework assignment by clicking the
Executebutton to make sure it runs from start to finish and produces the expected results. -
Make sure that you saved your code with the name of the assignment number (i.e.,
assignment_01). You should see the file in your git repo on your machine. -
Make sure that your code will run on other computers (relevant for all assignments after the first assignment)
- No
cd. Use aproject.dofile instead to set directories - Use only relative paths in files other than the
project.dofile - Use
/not\for paths
- No
-
-
Challenge 2 (Challenge - 20 pts)
For this challange, you will need to use
ifandelsestatements along with the global$packto set up a loop that installs user written packages that we will need throughout the length of the course.1. Add an additional subsection (call it
**## 0.2 - Check if any required packages are installed) to theproject.dofile that will contain the code to install packages.2. Next, write an
ifstatement that will execute a code block if the global$packis equal to 1.3. After the
ifstatement, add braces ({}). The code that we write within these braces will be what gets executed if$packequals 1.4. Within the braces, define a local (
loc) calleduserpack. The contents of the local will be the following user written packages. When using a local in this way you need to use=in order to setuserpackequal to the list of user written packages. You will also need to inclose the list of packages in" ". Packages should be listed with just a space in between each package name and they must all be on the same line (no breaking or wrapping the line like we do in the style guide. This is the only exception to that rule). *blindschemes*estout*palettes*distinct*catplot*colrspace*coefplot5. After you define the local
userpackthen paste in the following code block. For each user written package in the localuserpack(foreach package in userpack) the code checks to see if the package is already installed (capture : which package, all). If it isn’t (if (_rc)), it creates a pop up window (capture window stopbox) calledrusurethat tells the user that the package is missing (You are missing some packages) and asks if the user wants to install the package (Do you want to install package?). If the user selectes “yes” than the code installs the package from the “ssc” repository (capture ssc install package, replace). If the package is not on “ssc” (if (_rc)), then the code creates another pop up window (window stopbox rusure) that tells the user the package is missing (This package is not on SSC.) and asks the user if they want to proceed without the package (Do you want to proceed without it?). Alternatively, if the package is already installed (else) then the code simply exists the loop (exit 199).loc userpack = "blindschemes estout palettes distinct catplot colrspace coefplot" * install packages that are on ssc foreach package in `userpack' { capture : which `package', all if (_rc) { capture window stopbox rusure "You are missing some packages." "Do you want to install `package'?" if _rc == 0 { capture ssc install `package', replace if (_rc) { window stopbox rusure `"This package is not on SSC. Do you want to proceed without it?"' } } else { exit 199 } } }6. Finally, after the above code block, but still within the
{}of the originalifstatment, tell Stata to update all user written packages (adofiles). And then permanently change the graphic scheme to one we just downloaded (set scheme plotplain, perm). Lastly, Stata’s default is to freeze the output it displays until you tell it to move on. We will turn this feature off (set more off).* update all ado files ado update, update * set graph and Stata preferences set scheme plotplain, perm set more off
Assignment submission checklist
Solutions
- Load or Download File
- Format the Code
- Basic If Statements
- Code Shuffle
- Create Project Do
- Check That Your Code Runs
- Challenge 2